- TIPS & TRICKS/
- How to Separate by First & Last Name in Excel/


How to Separate by First & Last Name in Excel
- TIPS & TRICKS/
- How to Separate by First & Last Name in Excel/
How to Separate by First & Last Name in Excel
Many businesses in a variety of industries use Excel to store name data. This data may be the names of your employees, customers, clients, partners, or leads. While these are often stored with both first and last names in the same cell, there are some cases where you may want them split up and separated.
Unfortunately, handling this manually and moving over first or last names to a whole new column is incredibly time-consuming and could take hours, if not longer. Thankfully, there are a few methods you can use to quickly and easily move these names without putting in as much work.
Read this detailed guide to learn how to separate first and last name in Excel, why it’s important to do, and how to deal with common issues you may run into.
Looking to improve your skills further? Our instructor-led Excel courses are the perfect way to do so!
Why Separating Names is Important
Separating names may be important for your business for a number of different reasons. Keeping names separate helps with sorting or filtering them, may make it easier to search through your database, and often looks better and more organised than having everything cramped into one cell, especially if some names are long.
Another example of why separating names is crucial for some businesses is to help with customising emails or messaging. If you plan to deliver personalised emails as part of your marketing efforts, for example, you may want to include your target’s first name.
Having first names in their own cells and column ensures this is a swift process, and that you don’t need to manually remove last names when copying or merging names from Excel into your emails.
Step-by-Step Guide to Separating First and Last Names in Excel
Let’s go over the simple steps involved in using Excel to separate first and last names.
Text to Columns
The first method to consider to separate first and last names is using Excel’s Split Text to Columns feature.
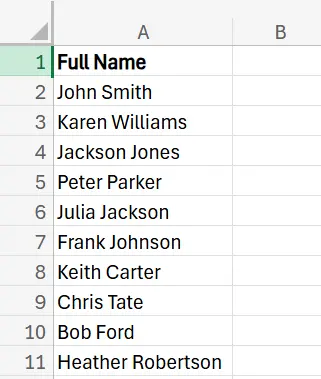
1. Begin by setting up or opening up your database of names.
2. Next, select the entire range of your database, navigate to the Data section of the Excel ribbon, and click Split Text to Columns.
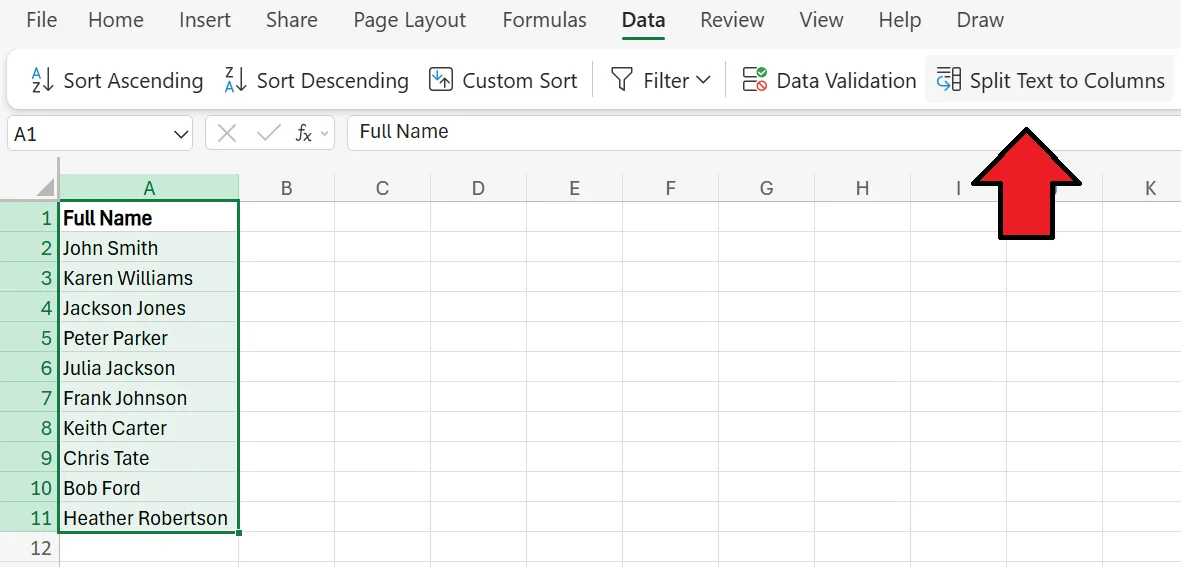
3. After clicking on it, a menu pops up and asks you to select your delimiters. This may vary depending on your data, but in the case of this example, choose Space. This is because it’s a space that separates the first and last names in the cells.

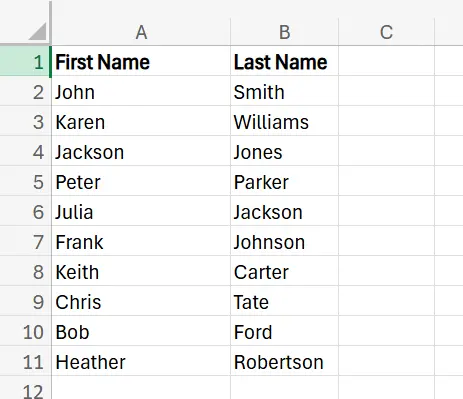
4. After you’ve chosen the proper delimiter, click Apply, and the names will automatically be split. Make sure to adjust the title of each column to properly reflect the information. In this example, we’ll change it from Full and Name to First Name and Last Name.
Formulas
You can also use formulas to split up first and last names in Excel.
1. Begin with your database of names, just like you did with the last method.
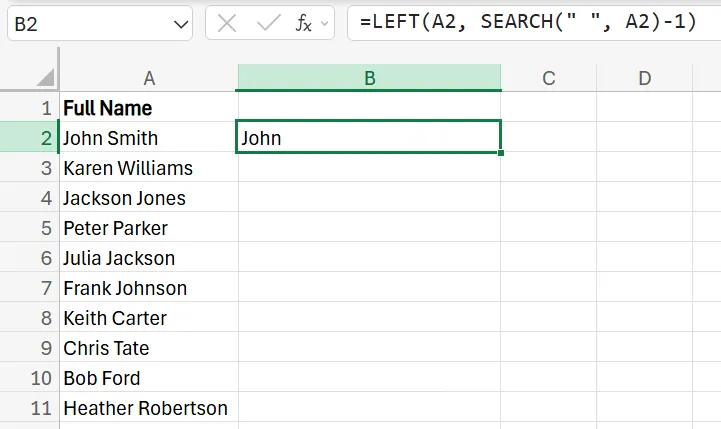
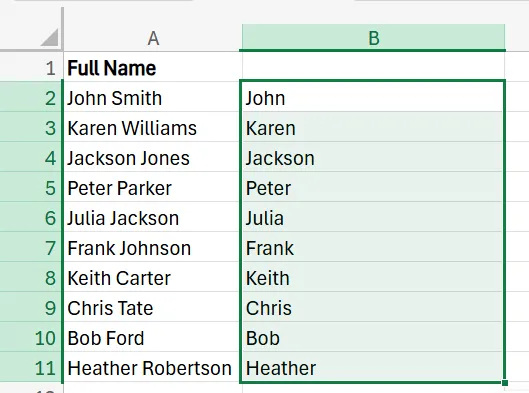
2. In the column where you want the first names to appear, enter the following formula =LEFT(cell, SEARCH(“ “, cell)-1) and hit Enter. Once you hit Enter, the first name will automatically show up.
3. Next, drag the formula down across the rest of the cells to populate the other first names.
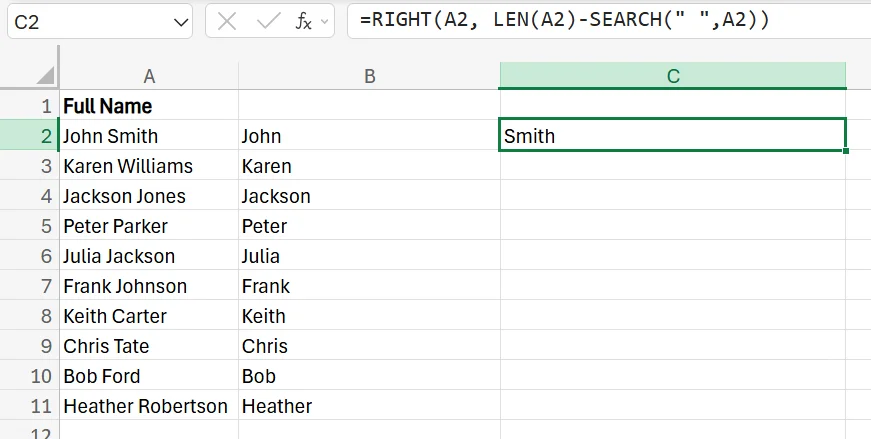
4. In the column where you want the last names to show up, enter the following formula =RIGHT(cell, LEN(cell)-SEARCH(“ “,cell)) and then hit Enter. After hitting Enter, the last name will appear.
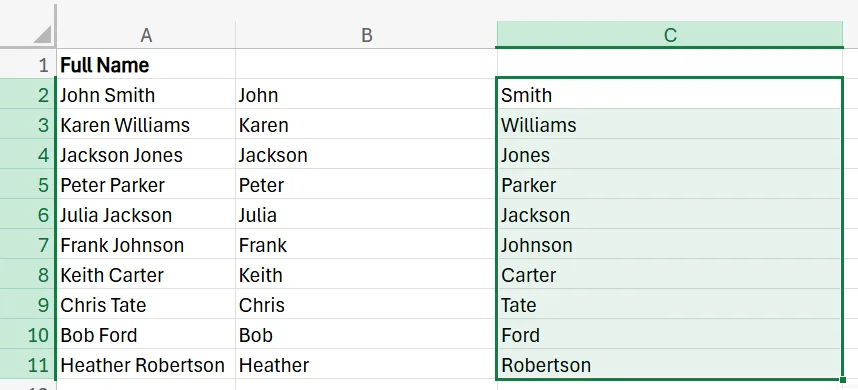
5. Again, drag the formula down to apply to all other cells.
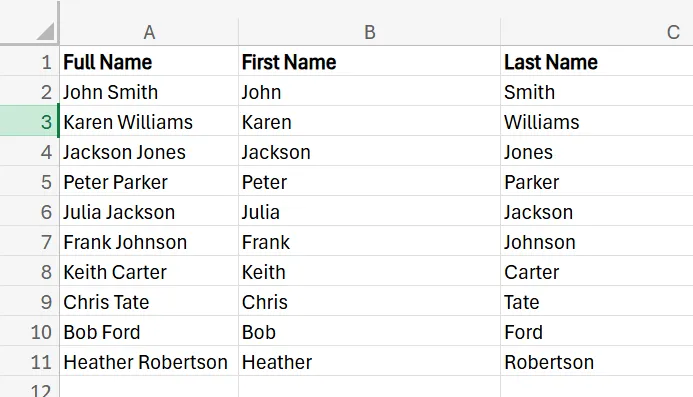
6. If you want, feel free to add titles like First Name and Last Name to these columns to ensure you don’t mix them up or get confused.
Troubleshooting Common Issues
While it’s generally easy to separate first and last names in Excel, there are some common issues you may run into.
Inconsistent Formats
Sometimes, the formats of your cells may be inconsistent from one to the next. For example, you may have extra spaces between some names or have special characters like hyphens or quotation marks that have found their way into your data and may interfere with the splitting process. Trying to use these methods with this type of inconsistency may lead to subpar or incomplete results.
To fix this issue, you may need to manually remove these inconsistencies before performing the split, or you may be able to use functions like TRIM in order to remove extra spaces.
Delimiter-Related Troubles
If you have multiple delimiters in the data, but haven’t properly selected them, you may run into issues splitting up names. For example, if your names have spaces, commas, and hyphens or other nonstandard options, you need to ensure that all of these delimiters are selected, and not just spaces.
Data Quality Problems
Issues like missing data, incomplete data, or even corrupted data may impact your ability to split names properly. The fix here is to check through the dataset and look for anything that’s corrupted or any cells that include data that may be interfering with the results.
Contact us today to learn more about how you can expand your business with Excel!
Related Articles
 Tips & Tricks
How to Calculate Age in Excel
Learn how to calculate age from a date of birth in Excel using the DATEDIF function, plus alternatives like YEARFRAC and INT for greater precision. This step-by-step guide covers cell formatting, formula entry, and quick copying, and explains why age calculations matter for HR planning, customer insights, and resource allocation.
 Tips & Tricks
How to Password Protect Excel & Hide a Single Column
Secure your Excel files with password protection and learn the simple steps to hide individual columns while keeping your data organised. This quick guide offers practical tips to enhance file privacy and streamline your workflow. Perfect for safeguarding sensitive information without locking down the entire spreadsheet.
 Tips & Tricks
How to Use Excel Lookup with Multiple Criteria
This blog explains how Excel’s LOOKUP functions—particularly XLOOKUP and VLOOKUP—can retrieve data based on multiple criteria. It walks through a step-by-step example of finding an employee’s sales in a specific region, showing both an XLOOKUP formula and a VLOOKUP alternative that uses a helper column.